 Xtractor
A single misaligned CSV column can stop a bulk QuickBooks Online invoice import and generate hours of manual cleanup. QuickBooks Online invoices CSV import template is a ready-to-use CSV layout that maps invoice fields to QuickBooks Online columns to prevent mapping errors and speed bulk uploads. This article supplies a field-by-field mapping, a validation checklist, and a reproducible test-import workflow that reduces manual entry and import errors. Our website shows how xtractor.app extracts invoice data from email into clean, tabular CSVs or Google Sheets using one-click bulk imports, custom parsing contexts, and scheduled runs. Try a short test-import to expose the five common field mismatches that cause most rejections.
Template contents: includes QBO invoice CSV required columns, sample file, and example rows.
This section provides a ready-to-download QuickBooks Online invoice CSV template, the exact columns QBO requires, and three import-ready example rows. Our website shows how the sample file represents single-line invoices, multi-line line items, and taxed invoices so you can copy patterns directly into your dataset. Use the template to validate column order and formats before you start mapping or importing.
Download the ready-to-use QBO invoice CSV required columns and sample file 📥
Download the ready-to-use file that contains the minimal and optional invoice columns QuickBooks Online accepts plus three annotated example invoices. The sample file includes: a single-line invoice, a multi-line invoice with separate items and quantities, and an invoice that applies sales tax. Keep one copy as your master template and a second copy for test imports.
You can produce a CSV that matches this template automatically by exporting parsed email data with xtractor.app and mapping its parsed fields into the template columns. Follow our step-by-step export guide for bulk CSV output in the Email Parser to Google Sheets: Fast Setup, Bulk Imports, and Scheduling (Step‑by‑Step) article if your invoices start as email confirmations. Run a small test import of 2–5 rows first to confirm column order and mapping in QuickBooks.
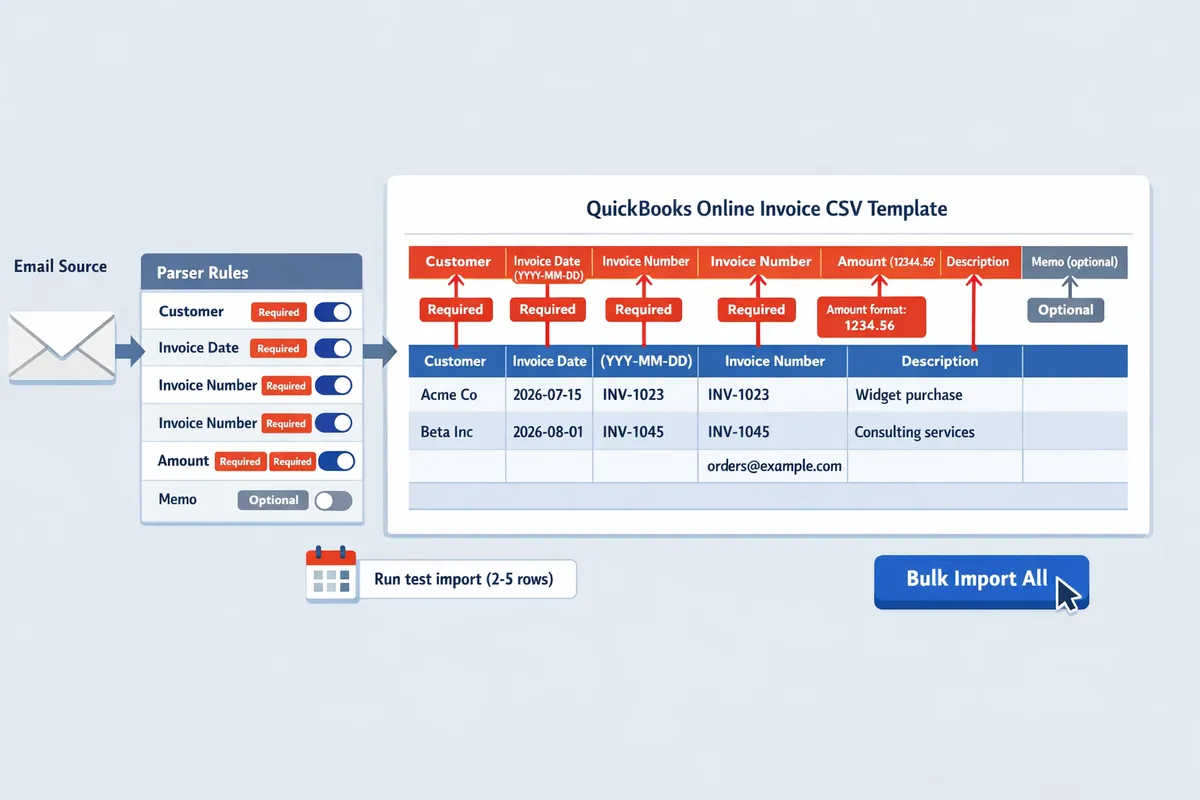
Field definitions and exact column formats 🧾
This list defines each CSV column and the exact format QuickBooks Online expects. Below are the required versus optional fields, precise formatting rules, and an example value for each column.
- Invoice Number (required). Use a unique alphanumeric string with no leading spaces. Example: INV-2026-001.
- Invoice Date (required). Format must be YYYY-MM-DD. Example: 2026-07-20.
- Due Date (optional). Use YYYY-MM-DD or leave blank for terms-based due dates. Example: 2026-08-20.
- Customer (required). Exact customer name as it appears in QuickBooks or the customer email for auto-matching. Example: Acme Widgets.
- Billing Email (optional). Include full email address to create or match customers. Example: billing@acme.com.
- Item (required for line items). Item name or SKU that exists in QuickBooks. For multi-line invoices repeat the Invoice Number and add a new Item row. Example: Widget A.
- Quantity (required for billed items). Numeric, decimal allowed. Use period as decimal separator. Example: 2.5.
- Rate (required for billed items). Numeric, decimal allowed, period as decimal separator. Example: 49.95.
- Taxable (optional). Use TRUE or FALSE. Example: TRUE.
- Tax Code (optional). Use your company tax code exactly as defined in QuickBooks. Example: TAXABLE.
- Class (optional). Use class name exactly as in QuickBooks. Example: West Region.
- Currency (optional). Use three-letter ISO code if multicurrency enabled. Example: USD.
- Memo (optional). One-line text field for notes. Example: Shipment included.
- Sales Rep (optional). Name matching QuickBooks sales rep field.
- Payment Amount (optional). Use only for recording partial payments in the same row; see sample rows for format.
⚠️ Warning: Date and numeric formats must match QuickBooks exactly (YYYY-MM-DD and period decimal separator) or QuickBooks will reject rows during import.
xtractor.app can map parsed fields into these exact columns so your exported CSV already matches the required formats and reduces manual rework.
Sample rows explained with import-ready examples 📄
These annotated sample rows show how to represent single-line invoices, multi-line line items, discounts, and tax so QuickBooks records match your source data. Each example shows the source scenario, the CSV representation (columns separated by commas), and the expected QuickBooks result.
-
Single-line invoice (simple sale).
- Scenario: One product sold, full payment due.
- CSV row: INV-2026-001,2026-07-20,2026-08-20,Acme Widgets,,Widget A,1,49.95,FALSE,,USD,Online order
- Expected result: QuickBooks creates one invoice for INV-2026-001 with one line item Widget A, quantity 1, rate 49.95, no tax.
-
Multi-line invoice (separate items on same invoice).
- Scenario: Two items billed on same invoice, second line taxable.
- CSV rows:
- INV-2026-002,2026-07-20,2026-08-20,Globex Corp,,Widget A,2,25.00,FALSE,,USD,Order 987
- INV-2026-002,2026-07-20,2026-08-20,Globex Corp,,Service B,1,100.00,TRUE,TAXABLE,USD,Order 987
- Expected result: QuickBooks creates invoice INV-2026-002 with two lines. The second line is taxed using TAXABLE tax code.
-
Invoice with discount and partial payment recorded.
- Scenario: Apply line-level discount and record a partial payment received before import.
- CSV rows:
- INV-2026-003,2026-07-15,2026-08-14,Initech,,Consulting,10,150.00,TRUE,,USD,Monthly retainer
- INV-2026-003,2026-07-15,2026-08-14,Initech,,Discount,-1,150.00,FALSE,,USD,Promotional discount
- INV-2026-003,2026-07-15,2026-08-14,Initech,,,,,,USD,,Payment:,500.00
- Expected result: QuickBooks creates the invoice with a negative line for the discount, then posts a payment of 500.00 applied to the invoice balance.
Step-by-step test-import checklist:
- Copy two to five sample rows into a new CSV and keep the header row identical to the template.
- Import into a QuickBooks test company or a non-production account to validate mappings.
- Verify customer matching, item lines, tax application, and payment posting.
- Adjust CSV formats in your source exporter or with xtractor.app field mapping if any rows fail.
💡 Tip: Always run a test import with a few rows first. Use xtractor.app to bulk-export those same rows so you confirm the end-to-end pipeline from email extraction to QuickBooks import.
If your invoices originate as email confirmations, use our multi-context parsing guide to handle different layouts and produce consistent CSV exports: Multi-Context Parsing to Handle Varying Email Layouts: Step-by-Step Setup with Real-World Templates. For help automating exports directly into Google Sheets or CSV for import, see Email Parser to Google Sheets: Fast Setup, Bulk Imports, and Scheduling (Step‑by‑Step).
How to use the template effectively: map columns, validate data, and run a safe test import.
Follow a prepare → test → verify → import workflow so you catch mapping and data issues before they become reconciliation problems. Running a small test import prevents duplicate invoices, incorrect tax treatment, and missing line items that otherwise cost hours to fix.
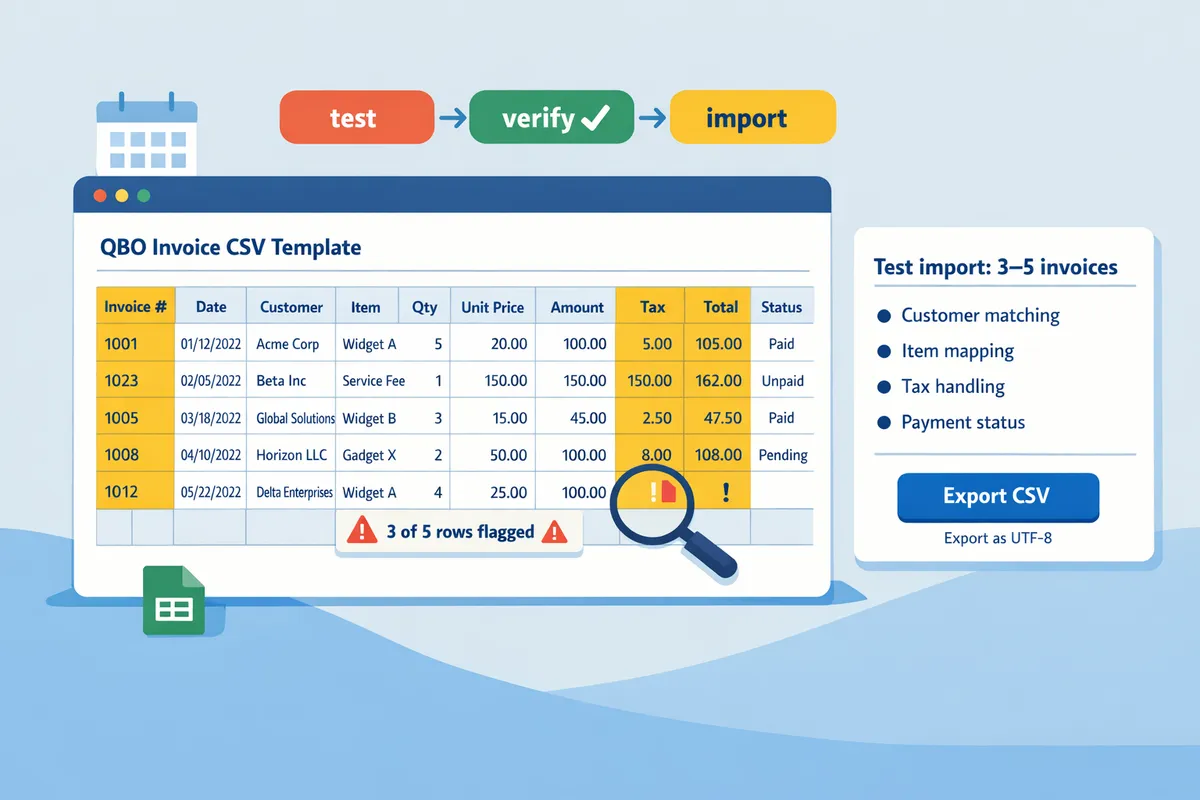
Step-by-step test-import workflow (small batch) ✅
Run a 3–5 invoice test import that mirrors your typical invoices to confirm customer matching, item mapping, tax handling, and payment status. Export the CSV from your spreadsheet as UTF-8, comma-delimited, and include only the rows you want to test. In QuickBooks Online, open the Invoices import tool, upload the file, and map each column to the QBO invoice CSV required columns and sample file headers in our template. After import, verify three things on each invoice: customer matched correctly (not auto-created), each line item and quantity appears exactly as in your source, and tax calculated per your tax code column. If an error appears, fix the CSV and re-run the test; avoid importing larger batches until the test is clean.
💡 Tip: Prefix test invoice numbers with TEST- to prevent accidental duplicates in your live data.
Pre-import validation checklist to avoid common errors 🔍
Run a short validation checklist on the CSV to prevent the most common QuickBooks import failures. Check customer names or Customer IDs against QBO to avoid auto-created customers. Confirm item SKUs or service names exist in QBO; if they do not, create them first or include the exact name used in QBO. Ensure date columns use a consistent format (YYYY-MM-DD or MM/DD/YYYY depending on your QBO company settings) and verify currency codes match the company currency for multicurrency files. Use quick Google Sheets checks: filter blanks for required fields, use COUNTIF to find duplicate invoice numbers, and use simple ISDATE-style logic to flag invalid dates. For multi-line invoices, make each line its own row using the same Invoice No. and leave customer fields blank on subsequent rows per the template.
How to map email order data to QuickBooks Online invoice fields using xtractor.app ✉️
Use xtractor.app to parse emails into a clean spreadsheet, then map those columns directly to the QuickBooks template fields. Configure xtractor.app to extract order number, customer email, customer name, item lines, quantity, rate, tax code, and totals; export the results to Google Sheets or CSV. Map order number → Invoice No., customer email or name → Customer, and split each item into separate rows using the same Invoice No. so QBO reads them as multi-line invoices. If your emails vary in layout, our multi-context parsing guide shows how to capture differing formats reliably. See our step-by-step Email Parser to Google Sheets guide for a full setup and scheduling workflow that reduces manual copy-and-paste before import.
Common import errors and targeted fixes 🛠️
Most QuickBooks CSV import failures come from mismatched customers, invalid tax codes, date formatting, or duplicate invoice numbers. Use the table below to diagnose and fix common errors quickly.
| Error | Likely cause | Fix |
|---|---|---|
| Customer mismatch / new unwanted customer | Source name doesn’t exactly match QBO or ID missing | Use exact Customer Name or Customer ID from QuickBooks; run a test import and correct names in source CSV. |
| Duplicate invoice number | Invoice numbers already exist in QBO | Add a temporary prefix for tests or remove duplicates with COUNTIF before full import. |
| Invalid date | Wrong date format or misplaced column | Reformat dates to your QBO company format (e.g., YYYY-MM-DD) and re-export CSV. |
| Item not found | SKU or item name differs from QBO | Create the item in QBO first or change CSV to match the QBO item name/SKU. |
| Incorrect tax calculation | Wrong tax code or missing tax column | Confirm tax codes in QBO, update the CSV tax column to match exact tax code names, and re-test. |
| Blank required fields | Missing required columns or empty cells | Filter for blanks, fill required fields, and ensure header row matches the template headers exactly. |
⚠️ Warning: QuickBooks may auto-create customers or items for unmatched names; verify the created records and remove any test or duplicate entries before a full import.
If you parse orders with xtractor.app and then hit an error, adjust parsing contexts or column names and re-export; xtractor.app’s scheduling and saved searches let you regenerate corrected CSVs quickly. For related workflows that convert bank statements or other documents into QBO-ready files, see our Convert Bank Statements to QBO and Convert Bank Statement PDF to QuickBooks guides.
Customization tips and examples: adapt the template for multi-line items, taxes, and automated email parsing.
This section provides ready-to-use CSV header mappings and copyable examples to handle multi-line items, mixed tax lines, multi-currency sales, and email-parsed orders for QuickBooks Online imports. Use the mapping table and worked examples to reduce manual edits and improve first-pass import success.
CSV column to QuickBooks Online invoice field mapping table 📊
The table below maps common source columns to the exact QuickBooks Online invoice CSV headers our template uses. Use these headers verbatim in your CSV or Google Sheet so QuickBooks recognizes each column during the import.
| Source column (spreadsheet / email) | QBO invoice field | CSV header to use (exact) | Sample value | Notes and handling |
|---|---|---|---|---|
| Order number or invoice ID | Invoice identifier | Invoice No | INV-1001 | Repeat the same Invoice No for each line item that belongs to one invoice. |
| Customer name or email | Customer (display name in QBO) | Customer | ACME Corp | Use the exact customer name as listed in QBO. If you only have email, include Email too and run a small lookup to avoid duplicates. |
| Invoice date from source | Invoice Date | Invoice Date | 2026-07-01 | Use YYYY-MM-DD or the locale format QuickBooks expects. Test one row to confirm. |
| Item name from catalog | Item (QBO item name) | Item | Widget A | Item must exactly match a QBO item. If lookup fails, leave Item blank and populate Service Description. |
| Line details or short note | Description | Description | Blue, 10″ x 12″ | This text appears on the invoice line in QBO. |
| Quantity ordered | Quantity | Qty | 3 | Integer or decimal allowed depending on item type. |
| Unit price | Rate | Rate | 19.99 | Use currency format without grouping commas. |
| Line total | Amount | Amount | 59.97 | Optional if Qty and Rate present; QBO will compute Amount from Qty x Rate. |
| Taxable flag from source | Taxable status | Taxable | Yes | Use Yes/No or True/False. See tax handling example below. |
| Tax code used by your accounting | Sales tax code | TaxCode | TAX_STANDARD | Map tax codes in QBO first; use the exact tax code name. |
| Currency on order | Currency | Currency | USD | Include only for multi-currency companies. |
| Exchange rate (if currency ≠ home) | Exchange rate | Exchange Rate | 1.23 | Only include if Currency is present and you want a fixed conversion. |
| Free-form order notes or fallback | Service Description (fallback) | Service Description | Custom engraving: “J. Smith” | Use when Item lookup fails to preserve line-level detail. |
When an invoice has multiple line items, create one CSV row per line and repeat the Invoice No across those rows. QuickBooks groups rows with matching Invoice No into a single invoice during import. If an item name does not exist in QBO, preserve the revenue detail by putting the text into Service Description and map the line to a generic income Account in QBO after import.
Example: converting multi-line email orders into QBO invoice rows ✏️
A single email order with three line items becomes three CSV rows that share the same Invoice No and include distinct Item, Qty, and Rate values. Below is a copy-paste ready example you can reproduce in your sheet or CSV.
| Invoice No | Customer | Invoice Date | Item | Description | Qty | Rate | Taxable | Amount | Service Description |
|---|---|---|---|---|---|---|---|---|---|
| INV-2003 | Bright Co | 2026-07-10 | Widget A | Blue finish | 2 | 25.00 | Yes | 50.00 | |
| INV-2003 | Bright Co | 2026-07-10 | Widget B | Gift wrap | 1 | 10.00 | No | 10.00 | |
| INV-2003 | Bright Co | 2026-07-10 | Custom build | 1 | 75.00 | Yes | 75.00 | Custom build: engraving “Happy Bday” |
Step-by-step process to convert email orders into this CSV format:
- Parse the email to extract Order No, Customer, Date, each line’s Item/Qty/Price, and any line notes. Use consistent field names in the parsed output that match the CSV headers above.
- For multi-line orders, emit one parsed row per order line and copy the same Invoice No into each row.
- If the Item value does not match QBO, leave Item blank and copy the product text into Service Description so revenue detail is preserved.
- Run a 5–10 invoice test import and compare invoice totals and line counts back to the source emails before a full run.
💡 Tip: Always run a small test import (5–10 invoices) and verify totals and line items in QuickBooks before importing the full batch.
Example: tax handling and mixed-rate invoices 🧾
Represent taxable and non-taxable lines by marking each row’s Taxable status and applying a mapped TaxCode so QuickBooks computes tax correctly after import. Use Taxable=Yes and a valid TaxCode when you want QuickBooks to calculate tax based on the company nexus and tax rules.
Practical guidance:
- Use Taxable set to Yes/No at the line level and provide TaxCode to let QuickBooks compute tax. This keeps tax calculation consistent with your QBO tax setup.
- Include explicit tax amounts only when the source tax logic cannot be recreated in QuickBooks (for example, an external marketplace fee). In that case, include a TaxAmount column and mark the line Taxable=No so QuickBooks does not double-calculate tax.
- Before a large import, verify that every TaxCode used in your CSV matches a tax code configured in QBO. Mismatched codes cause import errors.
Sample mixed-tax rows:
| Invoice No | Item | Qty | Rate | Taxable | TaxCode | Amount | TaxAmount |
|---|---|---|---|---|---|---|---|
| INV-3001 | Consulting | 1 | 500.00 | Yes | TAX_STANDARD | 500.00 | |
| INV-3001 | Reimbursement | 1 | 50.00 | No | NON_TAXABLE | 50.00 | |
| INV-3002 | Third-party fee | 1 | 30.00 | No | NON_TAXABLE | 30.00 | 3.00 |
If you include TaxAmount for a line, note in the TaxAmount column the exact tax you want recorded and mark Taxable as No to keep tax posting precise. Always test tax behavior in a sandbox or with a small batch first.
Automating CSV creation from inbox orders using xtractor.app ⚙️
xtractor.app is an email parsing and data-extraction tool that pulls structured fields from order emails and exports them to Google Sheets or CSV formatted with QuickBooks invoice headers. Our website recommends using xtractor.app when you need to convert high volumes of order emails into QuickBooks-ready CSVs without manual copy-paste.
Repeatable automation workflow (5 steps):
- Create parsing contexts in xtractor.app that capture Order No, Customer, Date, and each line’s Item/Qty/Price. Use multiple contexts if emails vary in layout. See our multi-context parsing guide for templates.
- Map parsed field names to the exact CSV headers from the mapping table above. Save the field-to-header mapping as part of the export template.
- Schedule daily or hourly parsing runs in xtractor.app and export the results to Google Sheets or CSV. Use the Email Parser to Google Sheets step-by-step guide for automated exports.
- Run a weekly test import of the previous day’s parsed file into QuickBooks using a small sample to catch mapping or tax-code mismatches.
- After verification, run the full import and reconcile totals against the source emails.
⚠️ Warning: Confirm customer names and item names match exactly in QuickBooks to avoid creating duplicates. Run regular reconciliation checks when you first enable automation.
Helpful links from our website to finish setup:
- For step-by-step parsing and scheduling: Email Parser to Google Sheets: Fast Setup, Bulk Imports, and Scheduling (Step‑by‑Step) Xtractor.
- If your inbox contains many templates, use multi-context parsing: Multi-Context Parsing to Handle Varying Email Layouts: Step-by-Step Setup with Real-World Templates.
- To automate exports without coding: How to Export Emails to Google Sheets Automatically Without Coding (Step-by-Step Tutorial).
Final steps: validate your mappings, run a small test import, then download the ready CSV template.
Use the QuickBooks Online invoices CSV import template to remove repeated manual entry and reduce import errors when you move invoices into QBO. Xtractor.app is an email parsing and data-extraction tool that pulls structured text out of emails and exports it directly into Google Sheets, CSV, or Excel. The product parses subject, sender, date, amounts, order numbers, and more, supports one-click bulk import and scheduling, and produces a clean tabular output you can use for bookkeeping and reporting.
Download the template and test with 5–10 invoices, confirm field mappings, and fix any validation warnings before a full upload. Follow our step-by-step email parsing guide to export order data into a spreadsheet and prepare a clean import: Email Parser to Google Sheets: Fast Setup, Bulk Imports, and Scheduling (Step‑by‑Step). For bank-side reconciliation after importing invoices, see Convert Bank Statement PDF to QuickBooks and Convert Bank Statements to QBO for compatible workflows.
💡 Tip: Run a test import using the QBO invoice CSV required columns and sample file to confirm your columns match QuickBooks fields before bulk import.
Download the CSV template from our guide and start the test import with Xtractor.app.